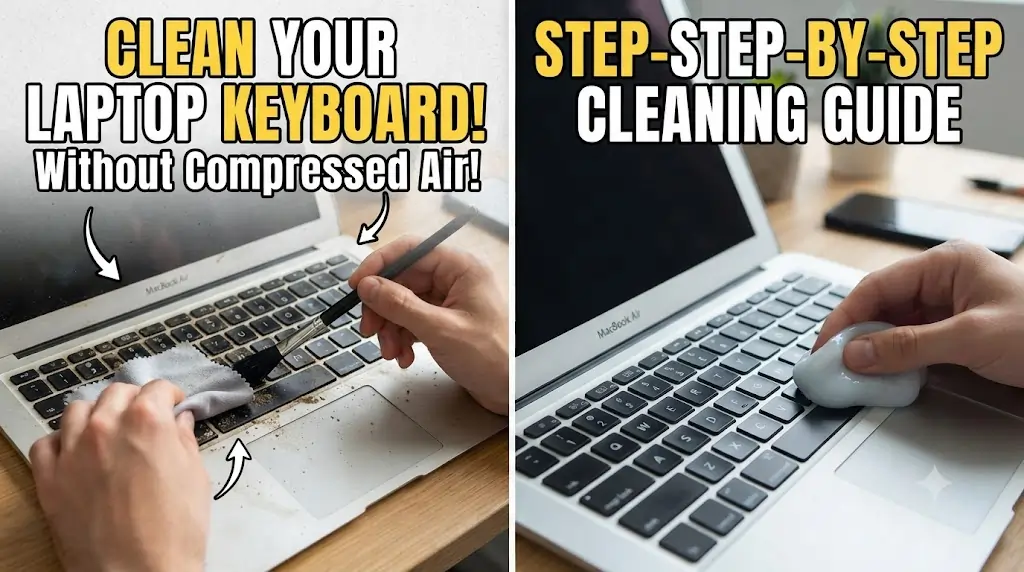
Dust, crumbs, skin oils, and sticky residue can quickly build up around laptop keys, making the keyboard look dirty and sometimes affecting how the keys feel. The good news is that you can clean a laptop keyboard without compressed air by using simple tools such as a soft brush, microfiber cloth, cotton swabs, or low-adhesive tape. However, laptops contain sensitive electronic parts, so you must clean carefully. Keep moisture away from the gaps between keys, ports, speakers, and other openings. Always turn off and unplug the laptop before cleaning to reduce the risk of damage.
Can You Clean a Laptop Keyboard Without Compressed Air?
Yes, you can clean a laptop keyboard without compressed air. Loose dust, crumbs, and other small particles can be removed with a soft brush, microfiber cloth, low-adhesive tape, or by carefully tilting the laptop so debris falls out.
For fingerprints, oils, and surface grime, use a microfiber cloth that is only slightly damp. Never spray water or cleaner directly onto the keyboard, and make sure no liquid enters the gaps around the keys.
What You Will Need
You do not need specialist equipment to clean a laptop keyboard. Most of the tools can be found around the home, but they should be clean and used gently.
- Soft microfiber cloth: Use it to remove dust, fingerprints, skin oils, and light surface grime without scratching the keys.
- Small soft-bristled brush: A clean makeup brush, paintbrush, or electronics brush can loosen crumbs and dust trapped between the keys.
- Cotton swabs: These are useful for cleaning narrow gaps and the edges around individual keys.
- Low-adhesive tape: Gently press it around the key gaps to collect small hairs, crumbs, and dust. Avoid strong tape that may leave sticky residue.
- Wooden toothpick or plastic cleaning pick: Use it carefully to loosen dirt around the edges of the keys. Do not push it deeply into the keyboard.
- 70% isopropyl alcohol: This may help remove oily or sticky marks when the laptop manufacturer allows it. Apply a very small amount to a cloth or cotton swab, never directly to the keyboard.
- Clean, dry towel: Place it under the laptop to protect the surface and collect any debris that falls out.
Laptop manufacturers commonly recommend using a soft, lint-free microfiber cloth and avoiding harsh cleaning chemicals or excessive moisture. Before using alcohol or another cleaning product, check the care instructions for your specific laptop model.
What to Do Before Cleaning the Keyboard
Before cleaning your laptop keyboard, take a few basic safety steps to protect the device and reduce the risk of electrical damage.
- Shut down the laptop: Do not clean the keyboard while the laptop is turned on or in sleep mode.
- Unplug the charger and connected devices: Disconnect the power cable, USB devices, headphones, external drives, and any other accessories.
- Remove the battery if it is safely removable: Some older laptops have removable batteries. Take it out only when the manufacturer’s instructions say it is safe to do so. Do not try to open a laptop with a built-in battery.
- Place the laptop on a clean, stable surface: Use a desk or table with a dry towel underneath. This protects the laptop and catches crumbs or dust that fall during cleaning.
- Check the manufacturer’s cleaning instructions: Different laptop models may have specific care requirements. Confirm whether products such as isopropyl alcohol or disinfecting wipes are safe for your keyboard.
Dell recommends turning off the laptop before cleaning, checking for debris between the keys, using a soft microfiber cloth, and avoiding harsh cleaning chemicals. Following these precautions helps prevent moisture, dirt, or cleaning products from reaching sensitive internal parts.
How to Clean a Laptop Keyboard Without Compressed Air
Follow these steps carefully to remove crumbs, dust, hair, oils, and light sticky residue without using canned air.
Step 1: Turn the Laptop Upside Down
Hold the laptop securely with both hands and tilt it at an angle over a clean towel. Gently tap the underside or give it a very light shake so loose crumbs and dust can fall out from between the keys.
Do not shake the laptop aggressively. Strong movements could damage internal parts, the screen hinges, or the keyboard mechanism.
Step 2: Brush Between the Keys
Use a clean, soft-bristled brush to loosen dust and debris trapped around the keys. A small paintbrush, makeup brush, or electronics-cleaning brush can work well.
Brush gently in several directions, including from side to side and from top to bottom. Try to move the dirt toward the edge of the keyboard instead of pushing it deeper underneath the keys.
Step 3: Use Low-Adhesive Tape for Small Debris
Cut a small piece of low-adhesive tape and fold it so the sticky side faces outward. Gently press it around the gaps between the keys to pick up fine dust, hair, and small crumbs.
Do not use strong packing tape, duct tape, or any adhesive that may pull at the keycaps. Strong tape can also leave sticky residue behind, making the keyboard more difficult to clean.
Step 4: Clean Around the Keys With a Cotton Swab
Start with a dry cotton swab and move it carefully around the edges of each key. This can remove dust and grime from narrow areas that a cloth cannot reach.
For sticky surface residue, lightly dampen the cotton swab with water or 70% isopropyl alcohol, but only when the laptop manufacturer allows it. The swab should be barely damp, not wet. Never let liquid drip into the spaces between the keys.
Step 5: Wipe the Key Surfaces
Use a soft microfiber cloth to wipe the tops of the keys, the palm rest, and the area surrounding the keyboard. A dry cloth is usually enough for loose dust and fingerprints.
For oily marks or light grime, use a cloth that is only slightly damp. Never spray water, alcohol, or cleaning solution directly onto the keyboard. Microsoft also advises users not to apply liquid directly to keyboard products because moisture can enter the device through small openings.
Step 6: Let the Keyboard Dry Completely
After cleaning, inspect the keyboard carefully for any visible moisture. Leave the laptop open and allow it to dry naturally in a well-ventilated area.
Do not reconnect the charger, attach any devices, or turn the laptop on until the keyboard is completely dry. This reduces the risk of short circuits and internal damage.
How to Clean Sticky Laptop Keys
Sticky laptop keys are often caused by skin oils, food residue, dust, or small drink splashes. Start by turning off the laptop and disconnecting the charger and other devices.
Use a dry microfiber cloth to wipe the tops of the keys. Then clean around the edges with a dry cotton swab. For stubborn grime, lightly dampen the cloth or swab with 70% isopropyl alcohol, but only when the laptop manufacturer allows it.
The cloth or swab should be barely damp. Never pour or spray liquid directly onto the keyboard, as moisture can enter through the gaps and damage internal components.
Press each sticky key gently several times while cleaning around its edges. This may help loosen dried residue. Do not force the key or use sharp metal tools.
If a key still sticks after surface cleaning, debris may be trapped underneath it. Avoid removing the keycap unless the manufacturer provides instructions for your exact laptop model. Laptop key hinges are fragile and can break easily.
A keyboard affected by a large liquid spill may need professional cleaning or replacement. Turn the laptop off immediately and avoid powering it on when liquid may have reached the internal parts.
How to Clean Under Laptop Keys
To clean under laptop keys, begin with the safest methods that do not require removing the keycaps. Shut down the laptop, unplug the charger, and place the device on a clean towel.
Tilt the laptop at an angle and gently tap the underside to release loose crumbs. Next, use a clean, soft-bristled brush to sweep around the edges of the keys. Brush in different directions so debris moves toward the outside of the keyboard instead of being pushed deeper inside.
You can also fold a small piece of low-adhesive tape with the sticky side facing outward. Carefully slide or press it around the gaps to pick up dust, hair, and tiny particles. A dry cotton swab can help clean narrow spaces around individual keys.
For stubborn dirt, use a wooden toothpick or plastic cleaning pick very gently. Keep the tool near the surface and avoid pushing it deeply under the keys, where it could damage the keyboard mechanism.
Do not remove laptop keycaps unless the manufacturer provides instructions for your exact model. Laptop keys often use delicate plastic clips and scissor mechanisms that can break easily. If dirt, liquid, or sticky residue is trapped deep underneath a key, professional cleaning may be safer than attempting to remove it yourself.
What Can You Use Instead of Compressed Air?
Several simple tools can remove dust and crumbs from a laptop keyboard without canned air. The best choice depends on whether you are cleaning loose debris, surface oils, or sticky residue.
A soft-bristled brush is one of the safest options for sweeping dust and crumbs from between the keys. Brush gently in several directions and move the debris toward the edge of the keyboard.
A microfiber cloth works well for fingerprints, skin oils, and surface dust. Use it dry for normal cleaning or slightly damp for light grime. Never allow liquid to drip into the keyboard.
Low-adhesive tape can pick up hair, fine dust, and small particles. Fold a small piece with the sticky side facing outward and press it gently around the gaps between keys. Avoid strong tape that may leave residue or pull at the keycaps.
Cotton swabs are useful for narrow spaces and the edges of individual keys. Start with a dry swab. For sticky marks, use one that is barely damp, but only with a cleaning product approved by the laptop manufacturer.
A manual rubber air blower can provide gentle airflow without chemicals or disposable cans. Keep the nozzle a short distance from the keyboard and avoid forcing debris deeper under the keys.
A rechargeable electric air duster may also be used, but choose a low setting and hold it away from the keyboard. Strong airflow can loosen keycaps or push dirt further inside.
An electronics-safe mini vacuum can collect loose crumbs, but it should have low suction and a soft attachment. Avoid using a powerful household vacuum because it may damage the keyboard or create static electricity.
These tools can replace compressed air for routine cleaning, but brushing and airflow will not remove oily or sticky residue. For that type of dirt, use a microfiber cloth or cotton swab with minimal moisture.
Cleaning Methods You Should Avoid
Some cleaning methods can damage laptop keys, coatings, or internal components. Avoid the following mistakes when cleaning your keyboard.
Spraying Liquid Directly on the Keyboard
Never spray water, alcohol, disinfectant, or another cleaner directly onto the keys. Liquid can enter through small gaps and reach sensitive electronic parts. Apply a small amount to a microfiber cloth or cotton swab instead.
Using Too Much Moisture
A wet cloth or dripping cotton swab can cause electrical damage. Any cleaning cloth should be only slightly damp, and the laptop must remain turned off until the keyboard is completely dry.
Cleaning With a Hair Dryer
Do not use a hair dryer to remove dust or dry the keyboard. Hot air may damage plastic keys, protective coatings, adhesives, or internal parts. Strong airflow can also push dirt deeper inside.
Using a Powerful Household Vacuum
A standard vacuum cleaner may create strong suction or static electricity. It can loosen keycaps and damage delicate keyboard mechanisms. Use only a low-powered device designed for electronics.
Applying Harsh Household Cleaners
Avoid bleach, ammonia, window cleaner, abrasive products, and strong disinfectants. These chemicals may fade the letters, damage surface coatings, or leave permanent marks.
Pushing Metal Tools Between the Keys
Do not use knives, screwdrivers, pins, paper clips, or other metal objects to remove debris. These tools can scratch the laptop, break the key mechanism, or touch internal electrical parts.
Scrubbing the Keys Aggressively
Hard scrubbing can wear away printed letters and damage the keyboard’s finish. Use light pressure with a soft microfiber cloth and repeat the cleaning process when necessary.
Removing Keycaps Without Instructions
Laptop keycaps are attached using small plastic clips and delicate scissor mechanisms. Pulling them off incorrectly may break the key or make it impossible to reinstall. Check the manufacturer’s instructions for your exact model before removing any keycap.
Shaking or Hitting the Laptop
Gently tilting and tapping the laptop can release loose crumbs, but aggressive shaking or hitting may damage the screen hinges, storage drive, keyboard, or other internal parts.
Turning the Laptop On Too Soon
Do not reconnect the charger or turn on the laptop while moisture is still visible. Allow the keyboard to dry completely before restoring power.
What to Do After a Liquid Spill
A liquid spill is more serious than ordinary dust or sticky residue. Acting quickly can reduce the risk of permanent damage.
Turn off the laptop immediately. Do not continue typing, saving files, or testing the keys. If the laptop does not shut down normally, press and hold the power button until it turns off.
Unplug the charger and disconnect all connected devices. Remove the battery only when it is designed to be safely removable. Do not open the laptop or force out a built-in battery.
Blot visible liquid with a clean, dry microfiber cloth or paper towel. Press gently rather than rubbing, as rubbing may push moisture deeper between the keys. Tilt the laptop carefully so liquid can drain away from the keyboard, but avoid shaking it.
Do not use a hair dryer, heater, oven, or other heat source. Heat can damage the keys, screen, battery, and internal components. Avoid pressing the keys repeatedly because this may force liquid farther inside.
Leave the laptop turned off in a dry, well-ventilated place. Do not reconnect the charger or test the keyboard simply because the surface appears dry. Moisture may still remain inside the device.
If the spill involved coffee, juice, soda, milk, or another sugary liquid, professional cleaning is strongly recommended. These drinks can leave sticky or corrosive residue even after the moisture dries. Seek repair help promptly if the laptop will not turn on, the keyboard behaves strangely, or the spill was large.
How Often Should You Clean a Laptop Keyboard?
How often you should clean a laptop keyboard depends on how frequently you use it and where you use it. For most people, a light surface wipe once a week is enough to remove fingerprints, skin oils, and visible dust.
Crumbs and debris between the keys should be removed every few weeks, especially if you often eat near your laptop. A deeper cleaning every one to three months can help prevent dirt from building up around the keys.
Clean the keyboard sooner when you notice sticky keys, visible grime, unusual resistance, or food particles trapped underneath. Shared laptops and keyboards used in offices, schools, or public spaces may need more frequent cleaning.
Avoid waiting until the keyboard becomes heavily soiled. Regular light cleaning is safer and easier than trying to remove thick residue later.
When Cleaning Will Not Fix the Keyboard
Cleaning can remove dust, crumbs, and sticky residue, but it will not solve every keyboard problem. If a key remains unresponsive after careful cleaning, the issue may involve damaged hardware, a loose connection, or a software fault.
A broken keycap, damaged plastic hinge, or worn keyboard switch may need repair or replacement. Pressing harder or repeatedly removing the keycap can make the damage worse.
If several keys stop working at the same time, the problem may be related to the keyboard cable, drivers, operating system settings, or internal components. Restarting the laptop, checking keyboard settings, and updating the appropriate drivers may help identify the cause.
Keys that type the wrong characters may also be caused by an incorrect keyboard language or layout. Check the input settings before assuming the keyboard is physically damaged.
Problems that begin after a liquid spill should be treated seriously. Even when the surface looks dry, moisture or sticky residue may remain inside the laptop and cause corrosion or electrical faults.
Consider professional repair when:
- One or more keys do not respond
- Keys type incorrect or repeated characters
- A keycap or hinge is broken
- The keyboard works only occasionally
- Multiple keys fail after a spill
- The laptop shows signs of internal liquid damage
- Cleaning does not improve the problem
A technician can inspect the keyboard, internal connectors, and other components to determine whether the keyboard needs repair or replacement.
Conclusion
Cleaning a laptop keyboard without compressed air is simple when you use the right tools and take basic safety precautions. A soft brush, microfiber cloth, cotton swabs, low-adhesive tape, and careful tilting can remove most dust, crumbs, oils, and light residue.
Always turn off and unplug the laptop before cleaning. Keep moisture away from the gaps between the keys, avoid harsh chemicals, and never spray liquid directly onto the keyboard. Regular light cleaning can prevent heavy buildup and help the keys stay comfortable to use.
If a key remains sticky, broken, or unresponsive after cleaning, the problem may involve damaged hardware or internal liquid residue. In that case, professional repair is safer than forcing the key or removing the keycap without proper instructions.
Frequently Asked Questions
Can I clean a laptop keyboard without compressed air?
Yes. You can remove loose dust and crumbs with a soft-bristled brush, microfiber cloth, low-adhesive tape, cotton swabs, or a manual rubber air blower. Always turn off and unplug the laptop before cleaning.
What is the safest way to remove crumbs from a laptop keyboard?
Hold the laptop securely at an angle and gently tap the underside so loose crumbs fall out. Follow this by brushing between the keys with a clean, soft brush. Avoid shaking or hitting the laptop aggressively.
Can I use a vacuum cleaner on my laptop keyboard?
A powerful household vacuum is not recommended because strong suction may loosen keycaps or damage delicate keyboard parts. An electronics-safe mini vacuum with low suction and a soft attachment is a safer option.
Can I use rubbing alcohol on laptop keys?
You may use a small amount of 70% isopropyl alcohol when the laptop manufacturer allows it. Apply it to a microfiber cloth or cotton swab rather than directly to the keyboard. The cloth should be barely damp, not wet.
Can I use water to clean a laptop keyboard?
A slightly damp microfiber cloth may be used for surface dirt, but water should never be sprayed or poured onto the keyboard. Moisture can enter the gaps between the keys and damage internal components.
Can I use disinfecting wipes on a laptop keyboard?
Some manufacturers allow certain disinfecting wipes, while others recommend only a soft, lightly dampened cloth. Check the cleaning instructions for your laptop model before using disinfectants, alcohol wipes, or household cleaning products.
Can I clean under laptop keys without removing them?
Yes. Use a soft brush, low-adhesive tape, dry cotton swabs, or a plastic cleaning pick around the edges of the keys. These methods can remove much of the debris without risking damage to the keycap mechanism.
Is it safe to remove laptop keycaps?
Removing laptop keycaps can be risky because the small plastic clips and scissor mechanisms may break. Only remove a keycap when the manufacturer provides instructions for your exact laptop model.
How do I clean sticky laptop keys?
Turn off the laptop and wipe the sticky key with a dry microfiber cloth. Clean around its edges with a cotton swab. For stubborn residue, use a swab that is barely damp with an approved cleaning solution. Never let liquid drip beneath the key.
Can I use a hair dryer to clean or dry the keyboard?
No. Hot air can damage plastic keys, coatings, adhesives, the battery, or internal components. Strong airflow may also push debris deeper into the keyboard. Allow the laptop to dry naturally in a ventilated place.
How long should I wait before turning the laptop back on?
Wait until the keyboard and surrounding areas are completely dry and no moisture is visible. After a significant liquid spill, surface dryness does not guarantee that the inside is dry, so professional inspection may be necessary.
Why is my keyboard key still not working after cleaning?
The problem may be caused by a broken key mechanism, damaged keyboard cable, incorrect input settings, driver issues, or internal liquid damage. If cleaning does not help, check the software settings or have the laptop inspected by a technician.